Market structure · 03
Six scored passes to run before you take a level trade — identify, assess, confirm, risk, target, final — plus what the score means and the two lists nobody fills in after the trade is over.
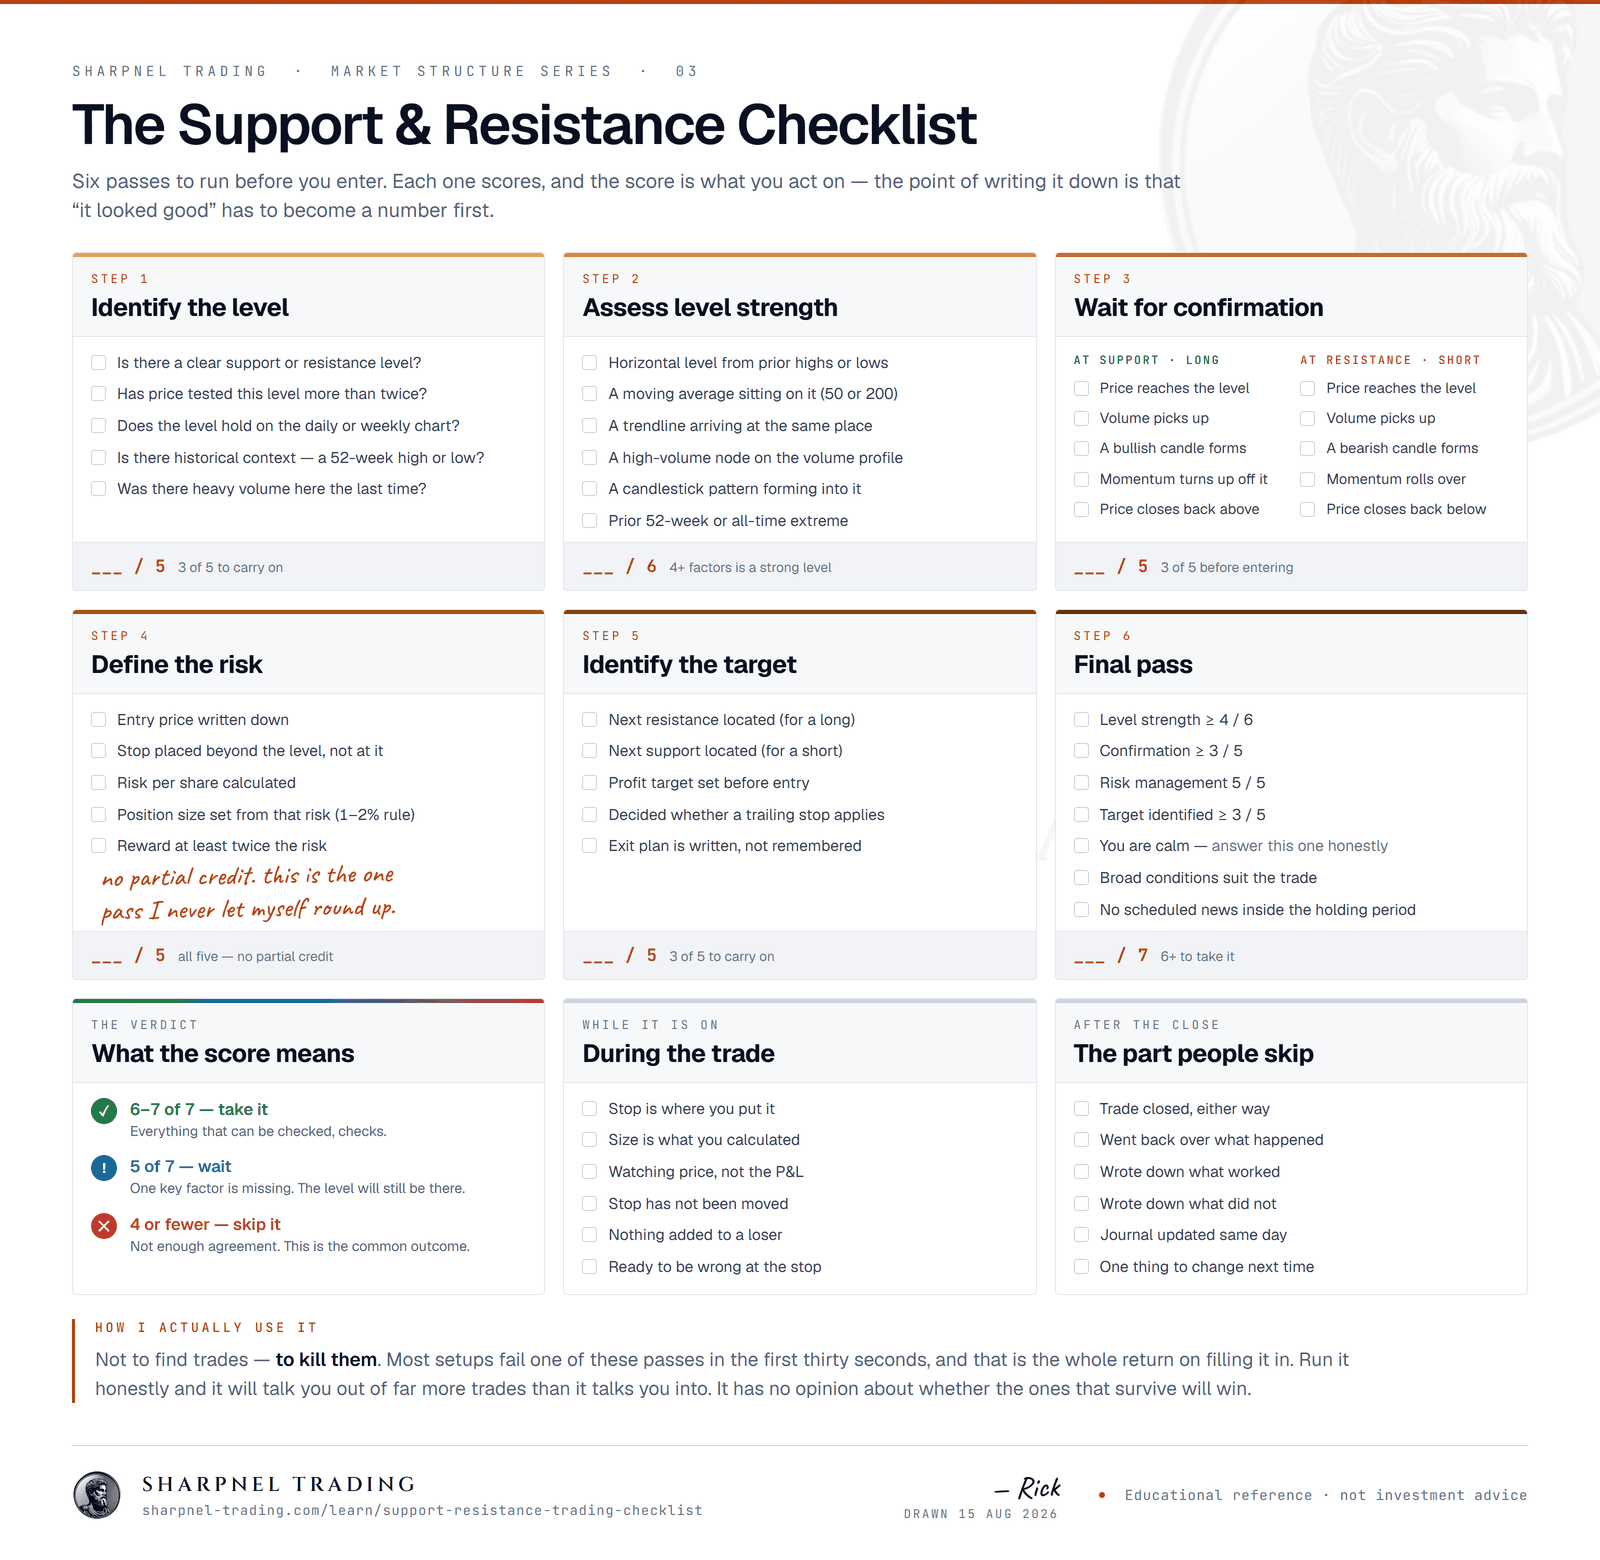
<a href="https://www.sharpnel-trading.com/learn/support-resistance-trading-checklist"><img src="https://www.sharpnel-trading.com/images/learn/support-resistance-trading-checklist-w1600.png" alt="The support and resistance trading checklist: six scored steps — identify the level, assess level strength, wait for confirmation, define the risk, identify the target, final pass — with a verdict scale of take it, wait, or skip it, plus during-trade and after-trade lists." width="100%"></a><p>Via <a href="https://www.sharpnel-trading.com/learn/support-resistance-trading-checklist">Sharpnel Trading</a></p>
A checklist you tick without counting is a ritual. The scores are what make it bite: each pass has a threshold, and if the level does not clear the threshold the trade does not happen, regardless of how good the chart looks. That is the entire mechanism. “It looked good” has to become a number before you are allowed to act on it.
Run honestly, this will talk you out of far more trades than it talks you into. That is the return on filling it in.
Score: ___ / 5 — 3 of 5 to carry on.
Score: ___ / 6 — 4+ factors is a strong level.
Score: ___ / 5 — 3 of 5 before entering.
Score: ___ / 5 — all five — no partial credit.
Score: ___ / 5 — 3 of 5 to carry on.
Score: ___ / 7 — 6+ of 7 to take it.
| Final score | Verdict | Why |
|---|---|---|
| 6–7 of 7 | Take it | Everything that can be checked, checks. |
| 5 of 7 | Wait | One key factor is missing. The level will still be there. |
| 4 or fewer | Skip it | Not enough agreement. This is the common outcome, and it is supposed to be. |
Step 2 is the one that separates a level from a line you drew. Confluence is simply the number of independent reasons the same price matters. A horizontal level that also has the 200-day moving average on it, a rising trendline arriving, and a high-volume node from the volume profile is not four times as good as a bare line — it is a price that four different groups of participants are watching for four different reasons.
The reason the threshold sits at four of six rather than six of six is that waiting for perfect confluence means never trading. Four is where the edge in this framework starts and the frequency is still workable.
The factor most level checklists leave out
Every item in step 2 is derived from price and volume history — where the market has been. None of them says anything about where dealers are structurally forced to buy or sell today.
Dealer gamma is that missing input. A call wall or put wall from the options book is a level with a mechanical reason behind it: market makers hedging their positions transact at those strikes whether they like the chart or not. When one lands on a level that already has four factors, you have technical confluence and a flow reason. I publish today’s /ES and /NQ walls before the open and grade them against the real session at 4:15 the same day, with the misses kept on the record. No account needed to read them.
Every other pass has a threshold below its maximum. Risk does not, and that asymmetry is deliberate. A level can be mediocre and the trade still survives. A position sized without knowing the risk per share does not, because the loss is unbounded by anything except how wrong you turn out to be.
The specific item people skip is the second one: stop placed beyond the level, not at it. A stop sitting exactly on the level you are trading is the stop most likely to be filled on the wick that then reverses in your direction.
The checklist does not end at entry. Two shorter lists cover the parts where discipline actually leaks.
Same day matters. A journal entry written on the weekend is a reconstruction, and it will quietly edit out whatever you would rather not have done.
Take this into the terminal
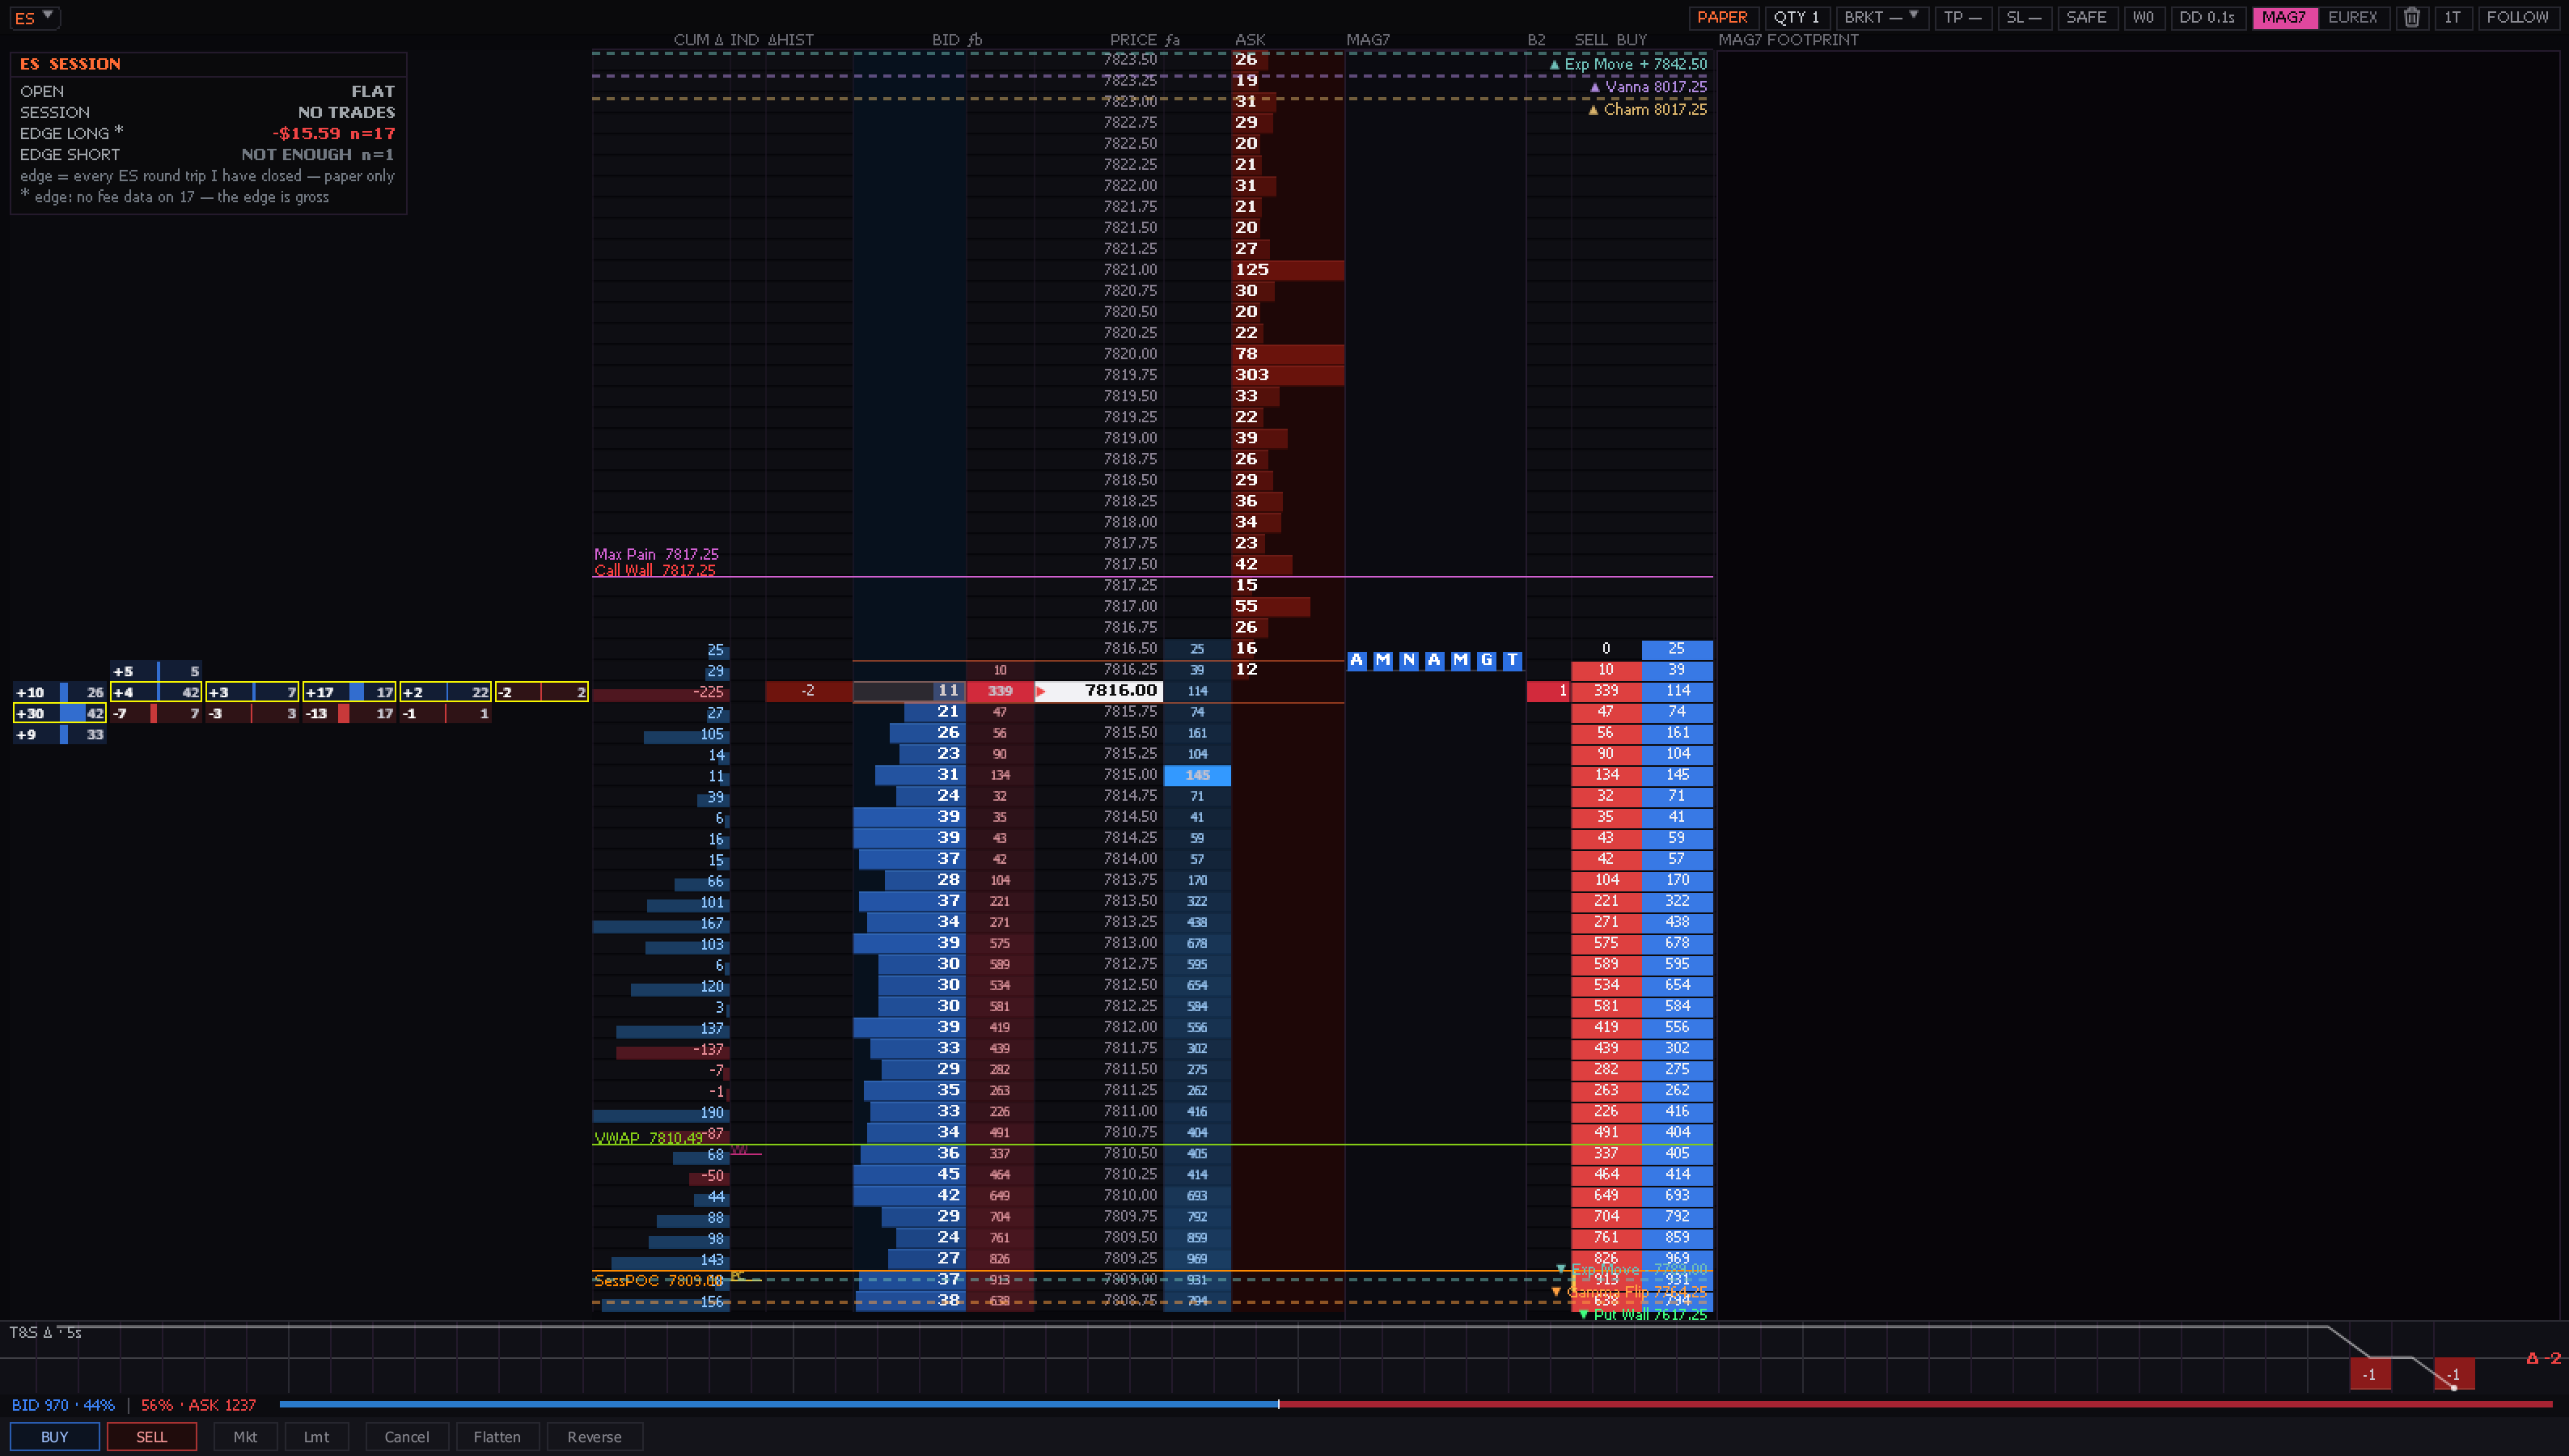
Footprint, the book and the TPO profile on one screen — steps 1 to 3 of the checklist answered without switching windows.
In this workspace
Worth adding — type add ⟨name⟩ in the palette
Presets sit in the strip under the menu bar — one click applies the whole layout, and every panel can be re-pointed at another symbol from its own header. How to run the Flight Deck desk.
Published August 14, 2026 · Educational reference only. Nothing here is investment advice or a recommendation to buy or sell any security. Fund names and tickers are given to identify what tracks a sector, not to endorse one.
Today’s free read
The ES/NQ dealer-gamma map — the walls, the flip point, the regime — free every morning, yesterday’s levels graded in the open.